Using Scanner in Java to Create and Read a Text File
This document explains how to use the Scanner class in Java to create a text file,
write data into it, and then read that data back.
Objective
This lesson will show you how to:
- Create a text file in Java.
- Write data into it (from scanner input).
- Read that data back from the same file and print it out.
Step 1: Import the Required Classes
This explains the imports.
import java.io.File;
import java.io.FileWriter;
import java.io.IOException;
import java.util.Scanner;
- File → represents a file or directory path.
- FileWriter → allows you to write data to a file.
- Scanner → reads input from the keyboard or from a file.
- IOException → handles errors when working with files.
Step 2: Create a Text File and Write Data
Click here and copy my source code into your Eclipse.
The name of the file will be: PX_CreateFileHardCoded_lastname
Files to Submit (Google Classroom)
- PX_CreateFileHardCoded_lastname.png — screenshot inside Eclipse
- PX_CreateFileHardCoded_lastname.java — Java source file
- PX_CreateFileHardCoded_lastname.txt — plain-text copy of your code
- PX_CreateFileHardCoded_lastname.mp4 — short demo video of the program running
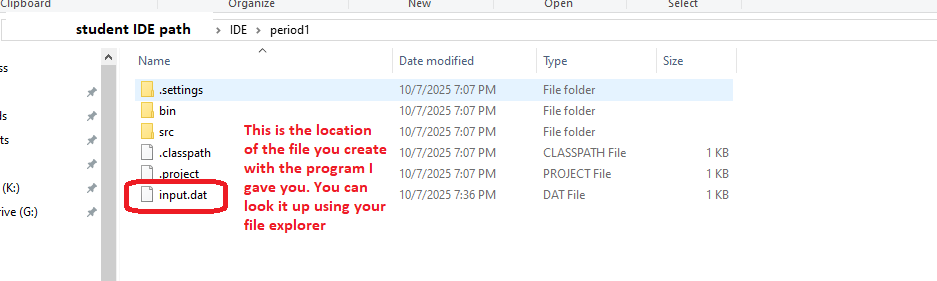
This is the location of your file when the execute the program above
Step 3: Read Data Back from the File and Print It
Click here and copy my source code into your Eclipse.
The name of the file will be: PX_ReadOneLine_lastname
Files to Submit (Google Classroom)
- PX_ReadOneLine_lastname.png — screenshot inside Eclipse
- PX_ReadOneLine_lastname.java — Java source file
- PX_ReadOneLine_lastname.txt — plain-text copy of your code
- PX_ReadOneLine_lastname.mp4 — short demo video of the program running
💡 This program uses Scanner again, but this time to read lines from the file and display them in the console.
Summary
- Create the
input.dat file with hardcoded data.
- Read the file
input.dat again using Scanner.